EPLAN.HOUSE
Before our family moved into a new house, I dreamed of making wooden beams on the ceiling. I don't know which style I like more Japanese with beams laid cages, or half-timbered, as in houses made of beams, which was written about in this article, but we will now install beams in the new one way or another house. When I searched online, I found several options, both from polyurethane and precious wood species. But the price started at 70$ per 1 running meter. We need 4 beams 6 meters long and one 3 meters long.
The only problem: beams cost more than $40 each! Beams of the right size cost $200. You must install them yourself and wait more than a week until they are delivered. No, no, thank you. It is better to do it with your own hands.
What tools and materials are needed for this project:
- Boards (Decided to use inexpensive boards from Leroy Merlin: 20x96x3000 mm ($1.5), 20x140x3000 ($2 rubles per piece) Total $56.
- Hammer and nails for finishing works
- Saw to saw by length
- Drill and long screws
- Wood stain - choose the color to your liking ($12).
- Steel band with a width of 25 mm (why I will explain later). $0.8.
- Plugs, if you're going to fix the beams to the concrete ceiling.
- Drill for concrete.
Not really necessary, but it will come in handy:
Glue for wood or liquid nails
Clamp
Take measurements and select a pattern.
This step is the easiest, but it will not let you make a mistake. Just look at the ceiling and imagine where you want to place the beams. Often used a pattern in a cage, as in Japanese style, or a beam installed in parallel, as in half-timbered style. Once you have decided on the design, use a meter to determine the size of the beams to calculate the required number of boards. Each running meter of beams will take 2 meters on the upper and lower edges and two meters on the side edges. Now go ahead to the store.
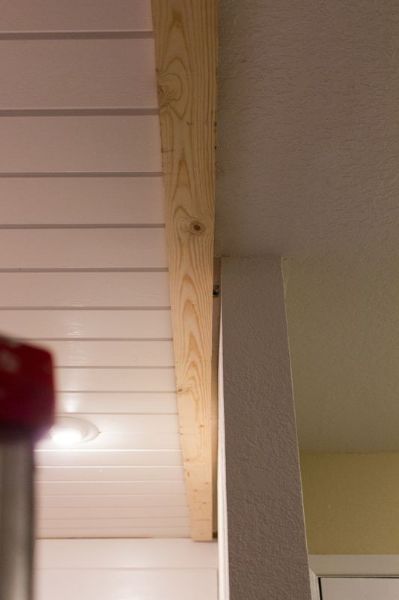
Nail the parts of the beams to the ceiling
Fake ceiling beams are nailed to hard materials to withstand the weight of the beams. Use ceiling lags or a concrete ceiling for this.
The beams are screwed to the concrete ceiling in different directions. One drawback to the concrete ceiling is that you first have to drill a lot of holes and insert plugs, combining these holes with the pre-drilled holes in the base of the fake beam. This means you have to shoot twice.
Another thing is the wooden ceiling. If the beams are installed along with the lags of the top, for example, through one or two lags, you can nail the base directly to the lags. But if the pattern requires a different arrangement of beams, then add spacers between the existing lags. This is easy to do if you haven't yet clad the ceiling. Otherwise, remove part of the ceiling lining. It is much easier to accomplish this task for beams that go perpendicular to lags, then nail to the ceiling at the intersection with lags.
For wooden slabs, use 100 mm long screws because the screw goes through the board, ceiling cladding, and one-third inside the lag), and for concrete ceiling, use screws 70-90 mm long.

Prepare the lower part of the beam
For the lower part of the beam use two planks 140 mm, nailing a board 100 mm wide between them, forming a box with three surfaces (n-shaped). gluing and nailing.
Use wooden dowels to fix the location of the lower board to the side, to create a beam in which the lower part is slightly recessed inside. This will create a narrow shade that gives depth to the beams when they are installed on the ceiling.
Finished beam

Sanding

Caulking of nail marks

Stain for wood

Beam Impregnation
Before applying the oil-based mordant, use a wood conditioner to make the acidic look homogeneous. Apply the conditioner with a brush and leave it for 10-15 minutes before wiping the excess with a rag. Apply the stain within two hours after the conditioner. The moril is also applied: apply the moril with a brush, leave it for 10-15 minutes, and remove the excess. If you want a darker shade, apply an extra layer of the stain after 4-6 hours. Do not skin between coats! Leave the beam to dry for a day before you start installing.
After looking at the reviews on woodworking oils, we decided to stop at Minwax® Wood Finish™ wood stain, which paints wood in the color of expensive species. The dye fills pores evenly, preventing other particles from getting into them.
Such a can costs $9 in Walmart, but the remains will be helpful in other projects. We have spent a third of the can on a two-layer coating.
Impregnation of beams with stain

Installed beam

Fixing the beam to the nailed board is easier with brackets, as it is challenging to hit the board with a hammer 2 cm thick when the ceiling from above interferes. It is also better to do this work together so that one holds and the other nails. To support the beam at one end, use a car jack with fixed support from the board. It is better to place the jack on a table, so you do not have to look for longboards to support it.
I knew it would end there, so the first thing that came to mind was to use a metal strip for fasteners. For each joint and at the ends of the girders, you need 42 cm long pieces. The metal profile is sold for 3 meters, it is enough for eyes for five beams, and the price is ridiculous. First, the strips are marked by length, and then they are cut with scissors on metal.
Beam joints

Then take the strip cut to length, apply to a hard surface with a right angle on the mark, and hammer to give the desired shape. These strips also bend easily. When both sides of the strip have taken the proper form, drill holes at the edges suitable for screws. Once the strips are ready (it took less than an hour), it's time to paint and let dry.
Metal strips

Bracket preparation

Screwing the bracket

Staple Painting

Bracket in place

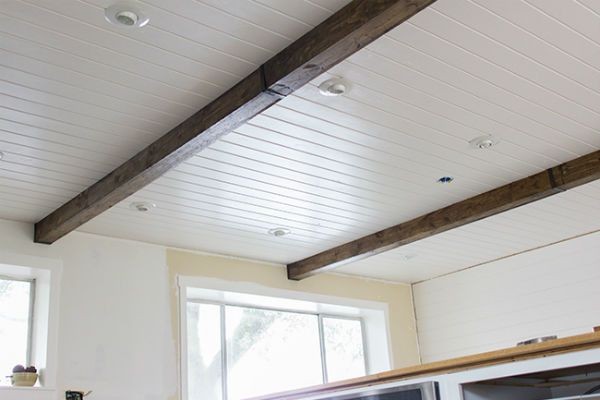
Although the renovation is not finished yet, changes can already be felt. And the beams look like real ones. And how nice to know that it is done by your own hands. And only $100 was spent on this beauty.
I hope that this will inspire you to make the right home things like this. At first, it seems to be difficult, with no money or time. But if you take the first step, then any work will work out - and time, money, and inspiration will come!
For fixing it to the concrete ceiling in an apartment or brick house, you may need a perforator. You can buy it from a reliable seller, with delivery by courier or by mail. There are many models of punches in the online store, from home to professional. Go to the store to see more about the range.