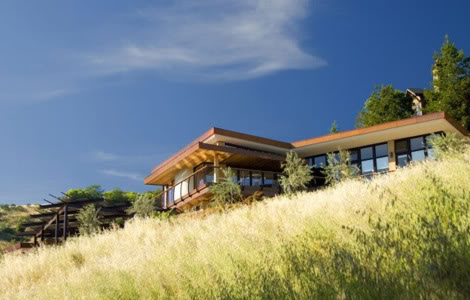
EPLAN.HOUSE
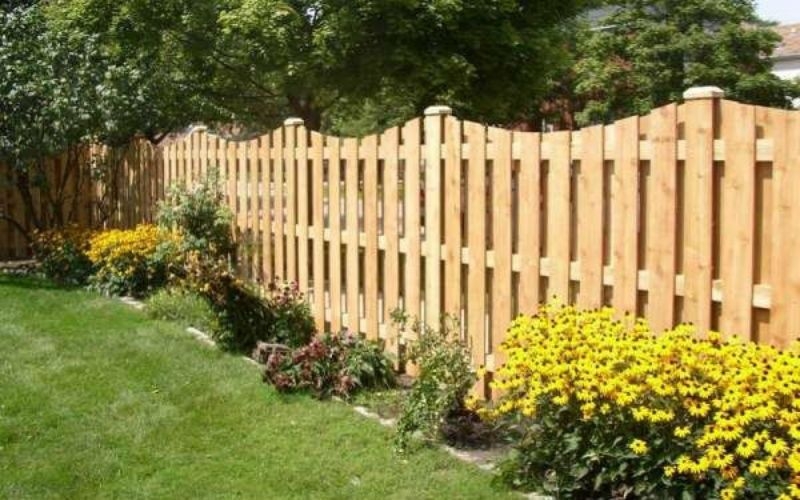
"Good fences make good neighbors." You may decide to build a fence on your property for various reasons: for safety, privacy, or security; or to complete the design of your home. When you understand what materials, what shape, and installation technique you need for a fence, you can easily build a wooden fence if you know how to work with your hands.
The basics of building a fence
A wooden fence is the most common type of fence that is still being built today because of wood availability, beauty, and the relatively low cost of construction and repair. Although you can buy pre-made fence panels, building from planks gives you more flexibility, more control over the quality of the material used, and often more enjoyment from the feeling of having done the work yourself.
The most common types of wood used to build fences are pine, spruce, cypress, and larch. When you choose boards for a fence, it is better to get boards from the middle part of the trunk - the core - than from the sapwood. Sapwood is older and usually has fewer knots, and is more durable than the younger, outer sapwood. But it is better to take impregnated wood, which, although more expensive, such as pine but is not afraid of contact with the ground and the weather, and the fence can last 50 years. It is also not necessary to take planned wood if you are going to paint the fence. The paint will last longer. The lumber used to make the fence includes the fence posts, purlins, and posts.
.
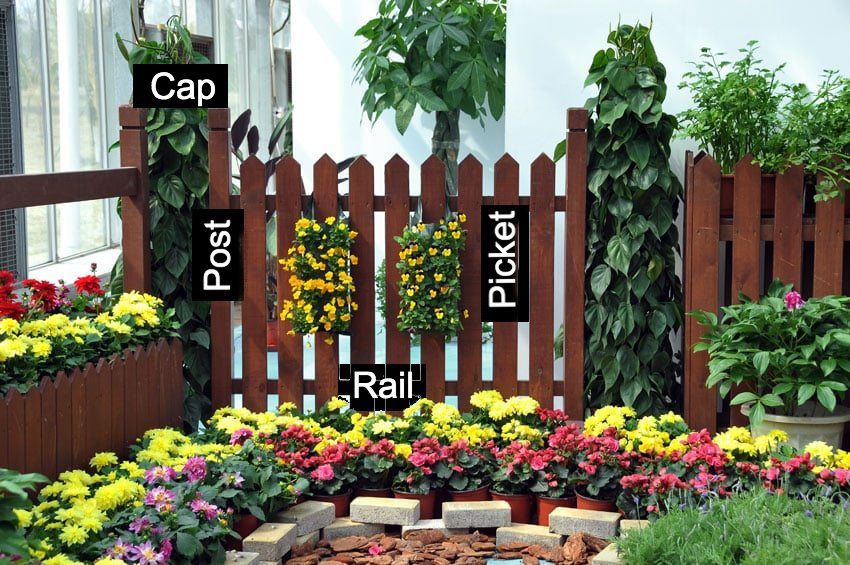
- Pickets are vertical boards that form the front surface of the fence. Their cross-section is usually 3/4"-1" thick and 4"-6" wide.
- Rails are horizontal parts of the fence, which are nailed to the fence posts. Usually used planks of section 2x4.
- Posts, which are partially buried in the ground, the vertical power elements that support the rails and fence pickets. Their cross-section is usually 4x4 or 6x6. The higher the fence, the thicker the post should be.
- Building a board fence allows you to show your imagination; however, I would like to note that neighbors can look up several traditional fences.
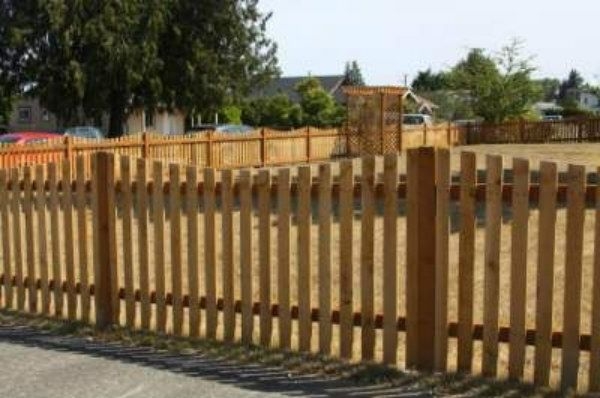
- Pickets fence usually consists of two rails, to which on one side is attached a picket with certain gaps between the boards. The height of such a fence can be from 3 to 4 feet.
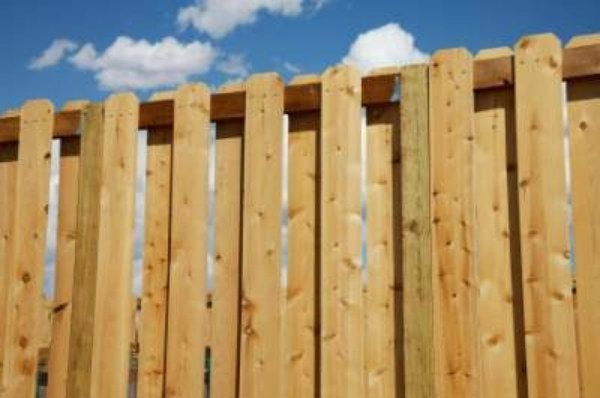
- Shield fences (board to board) usually consist of two or three rails, depending on the height of the fence. Pickets are nailed tightly, without gaps, on one side of the fence. They are usually three to six feet high.
You can give a twist to an ordinary fence by making the top of the picket fence pointed or rounded or by placing a decorative tip on top of the post. These details will add elegance; otherwise, you will have a wooden fence with a flat top.
Before you build a fence on your property, you should know exactly where the boundary of your property is to avoid conflicts with neighbors or authorities in the future. You may even want to bring a plate of fresh baked goods and a couple of packs of cold beer to your neighbors before installing a fence. This will give you a chance to have a conversation with your neighbors about your intentions for the fence. It will be better than just surprising them with a new fence.
Installing the rails and the pickets
When the concrete has hardened enough, you can start nailing the rails and pickets. Depending on the fence style, you may have top and bottom rails or multiple rails behind and/or between the boards of the picket fence. You can attach the rails to the posts in a variety of ways. For "checkerboard," and shield fences usually use the simplest method of attachment - overlapping. In this method, rails fasten to the surface of the post. The upper and lower rail for "chessboard" or shield is nailed at a certain distance from the top and bottom of the fence. If necessary, a third rail is set in the middle between them. The location of the rails will depend on the height and style of the fence. When you fasten the rails, start with the top rail, then fasten the bottom one (and finally the middle one if you need it). The rail should be sawn along the length from the middle of one post to the middle of the other and attached to the post with suitable fasteners. Saw the next rail and position its end so that it docks with the previous one. Continue until all the rails are attached.
Once the rails are nailed, it's time to attach the pickets. First, a picket with a decorative cap should be trimmed to the proper length along the bottom rib and then nailed. The skirting board, which has a straight or arched top between the posts, should be marked with chalk and sawed with a circular saw after being attached to the rails. Depending on the fence style, the posts may be separated or adjacent to each other. Tip: If the timbers are split, make a molding of a piece of board equal to the width of the desired gap. Additionally, you can string a rope between the posts as a guide to get the fence to the same height.
- Starting at the corner or end of the fence, keep the bottom of the timber at the level of the rope guide, use a plumb line to check for verticality, and nail the timber to each rail with two suitable nails.
- Move on to the next rail, using a molding board to divide the stringer to the proper distance, if necessary. Check the verticality with a plumb line on the other side and nail the batten to the rail. Continue until you have nailed the entire panel.
Finishing and repairs
The timber is nailed down, and the fence is built, but the work is not quite finished yet. Allow time for the wood to dry. The duration depends on the type of wood, time of year, and climate, so it is better to follow the recommendations of the seller of boards. When the recommended time has passed, clean the surface of the wood, using cleaners that remove dirt and oil from the saws. It is not recommended, nor necessary, to use detergents. Better, clean the surface of the fence with water and a cleaning solution, which can be applied from a spray bottle, brush, or roller, and then simply rinse with a garden hose. After the fence is washed, you need to coat it with one of three different types of protective coatings (water repellent primer, paint, or stain). Follow the manufacturer's instructions. High-quality, protective coatings will extend the life of your wood fence and save you money.
Just like a deck, a wooden fence needs to be taken care of regularly. Depending on the finish, it may need to be treated every year or every five years. Check your fence annually: if it's sagging or if the pickets, rails, or posts are broken, repair or replace them as needed.
Marking
It is best to prepare a plan on paper before you start building your fence. This will allow you to make the necessary adjustments to make sure that the final appearance of the fence will be as expected and will enable you to estimate how much material you will need more accurately.
After creating a plan on paper, you can mark the corners and ends location of the fence on the property. Position the corners, end, and line of the fence slightly inward from the property line.
- Carefully place wooden stakes to mark the center of all the corner and end posts.
- Drive a nail into the center of the peg and tighten the rope from peg to peg. Usually, the posts are between 6 and 8 feet apart. Then, starting from a corner or the end of the fence, measure the required distance to the next post.
- Determine the center of this post and mark its location with a peg.
- Continue until you have marked the location of all the posts with stakes.
Post installation
Once you find all post locations, you can begin installing them. Depending on the size and complexity of the fence, you can install the posts in one of three ways.
- Tamped down post
- Concreted post: Sprinkle 6 inches of gravel over the bottom of the hole and fill the remaining space around the base with concrete. You can use cylindrical concrete forms with this method. However, it is better to use galvanized or plastic sewer pipe, suitable for this purpose.
- Post anchored to a concrete pile: A concrete base is formed in the ground with an embedded metal column anchor. Cylindrical concrete forms can also be used here as desired.
In this article, we assume that you will be using impregnated posts (e.g., vacuum-pressure-vacuum-treated) suitable for contact with the ground so that wood can be used for pouring concrete. As a last resort, treat the bottom of the post with bitumen and wrap it with a roofing felt or a more modern waterproofing material. The holes for the posts you can make using a hand or electric drill. Drill to a depth of 1/3 to 1/2 the length of the visible part of the post. And with a diameter three times the width of the post. For example, if the post will be 6 feet off the ground and you are using a 4×4 bar, you should drill to about 2 to 3 feet deep and 12 inches in diameter. If the fence will be higher and the posts will be thicker, respectively, change the size of the hole.
- Backfill and tamp down a 6-inch-thick cushion of gravel in each hole, and insert cylindrical concrete forms if you like.
- Insert the post in the middle of the hole and anchor it to the ground using two 2x4 boards on each side of the post.
- Use a spirit level or plumb line to check that the post is vertical. Please do it for each post, then tighten a rope across each post top and near the bottom between each post. Next, use the string over the posts to level the height and check their alignment.
- Next, tie a rope along the bottom on the front side of each post. Again, it is better to check the fence installation line. Any necessary corrections should be made at this time so that you can change the position of the post in the hole.
- When the posts are aligned vertically, and in line, you can begin pouring concrete. Tip: If you don't want to see concrete, finish pouring a few inches short of ground level. This will allow you to fill the remaining space of the hole with soil. If you want to let the water flow away from the post, the other way around, fill the hole with soil to the top. Next, use a trowel to slope the concrete over the ground surface. Allow time for the concrete to harden before fixing the veins. Depending on the type of concrete and the air temperature, you may need to wait 1-3 days before you start nailing the veins.
Loading Conversation